> ## Documentation Index
> Fetch the complete documentation index at: https://kb.micro1.ai/llms.txt
> Use this file to discover all available pages before exploring further.
# Create a Job
> Jobs allows you to organize your candidates, move them through stages and control how they are invited to the interview.
To create a new job:
1. Click on [Open jobs](https://www.zara.micro1.ai/jobs) in the left navigation bar.
2. Click on **Add a job** in the top right of the page.
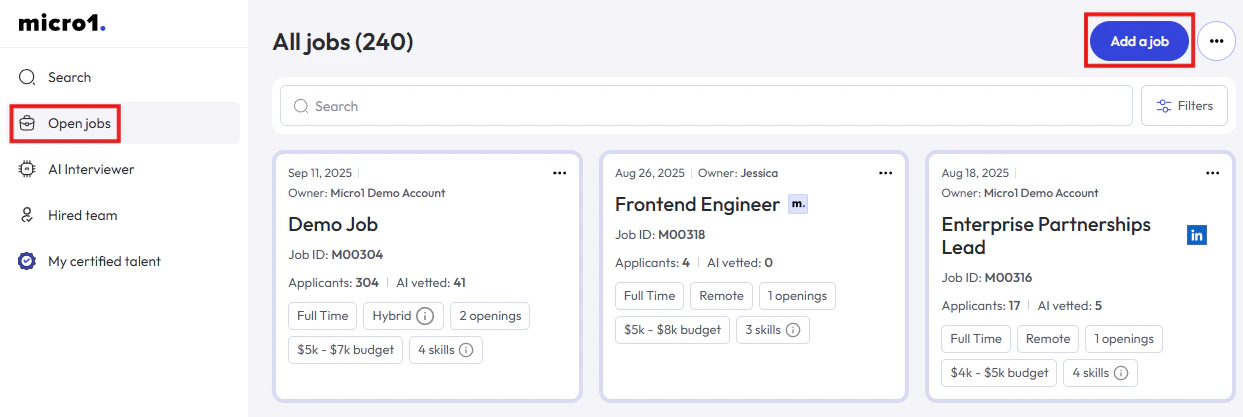 3. Fill the information about your job and click **Next**.
Only the job title and the list of skills may be visible publicly if you publish your job on any board.
3. Fill the information about your job and click **Next**.
Only the job title and the list of skills may be visible publicly if you publish your job on any board.
All the other fields are internal to the micro1 platform.
4. Add some extra details about your job (not visible publicly).
This information will be used to calculate the resume and AI match score of the candidate and also guide the system to produce an AI generated Job Description.
5. Wait for the AI to create a Job Description based on the information you provided.
You can review and update the Job Description using the text editor.
Basic text formatting capabilities are available like paragraph styles, bold, italic, lists and links.
6. Optionally, add [Screening Questions](/kb/jobs/screening-questions) or select an existing [Screening Form](/kb/jobs/screening-forms).
7. Optionally, select to which Job Boards you want to publish your job.
You can close the popup window without publishing the job if you are not ready to publish or if you prefer to send the link for candidates to apply using alternative methods.
8. After job is ready you need to [Create an AI Interview](/kb/interviews/create-interview).