> ## Documentation Index
> Fetch the complete documentation index at: https://kb.micro1.ai/llms.txt
> Use this file to discover all available pages before exploring further.
# AI Interviewer
> Learn how to use Zara as an AI Interviewer to screen and vet candidates at scale.
## Overview
This section walks through the full process of creating and running an AI Interview in Zara, from setup to reviewing candidate results.
### 1. Choose the role you want to interview for
Start by defining the job role you want to interview candidates for.\
For example, you may want to interview candidates for a **Customer Support** position.
This role will be used to name and configure the AI Interview that Zara will run for your candidates.
### 2. Create a new AI Interview
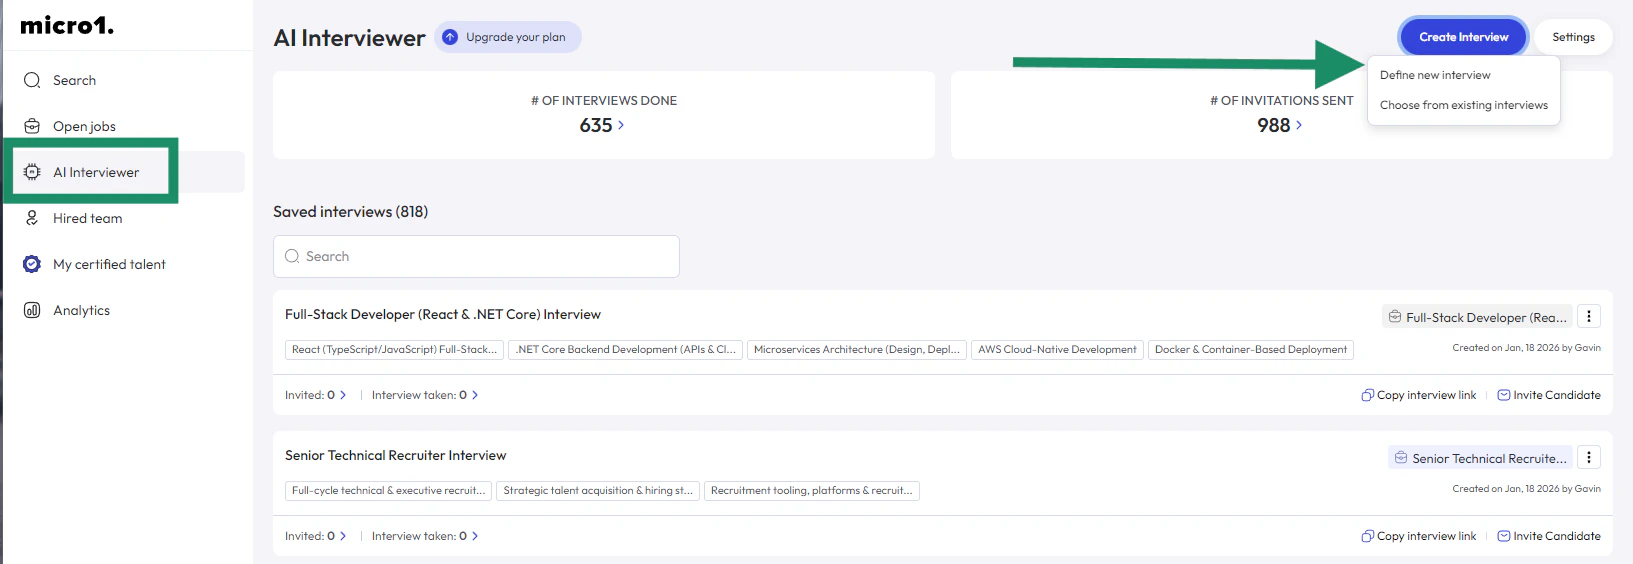
1. Open the **micro1 dashboard**
2. From the left-side navigation panel, click **AI Interviewer**
3. Click the **blue “Create Interview”** button in the top-right corner
This will open the interview creation flow.
 ### 3. Name the interview
On the first screen:
* Enter a name for the interview
* We recommend using the **role name plus an identifier** (for example, *Customer Support – Job ID ABC123*)
This name helps you identify the interview later when reviewing results or managing multiple roles.
### 4. Configure the interview setup
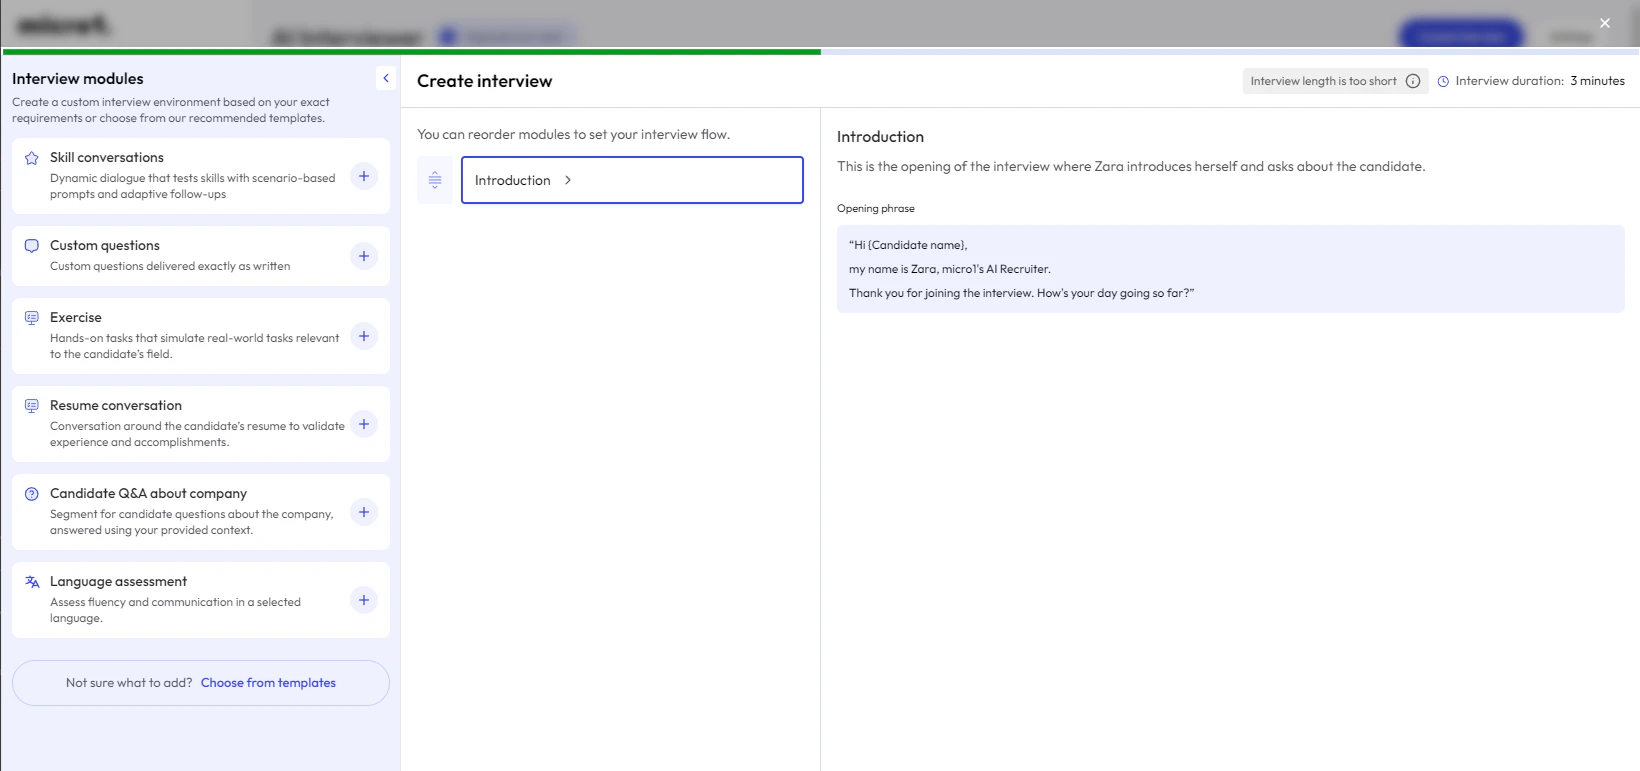
Next, you will define how Zara should conduct the interview.
During this step, you will:
* Select how the interview should be crafted
* Choose the interview structure, duration and format
For guidance on how to craft the interview, refer to the [Create Interview KB Page](/kb/interviews/create-interview).
### 3. Name the interview
On the first screen:
* Enter a name for the interview
* We recommend using the **role name plus an identifier** (for example, *Customer Support – Job ID ABC123*)
This name helps you identify the interview later when reviewing results or managing multiple roles.
### 4. Configure the interview setup
Next, you will define how Zara should conduct the interview.
During this step, you will:
* Select how the interview should be crafted
* Choose the interview structure, duration and format
For guidance on how to craft the interview, refer to the [Create Interview KB Page](/kb/interviews/create-interview).
 ### 5. Define the interview language and finalize creation
Before finishing:
* Select the language in which the interview will be conducted
* Review the configuration
* Finalize the interview creation
Once completed, the AI Interview is ready to be used with real candidates.
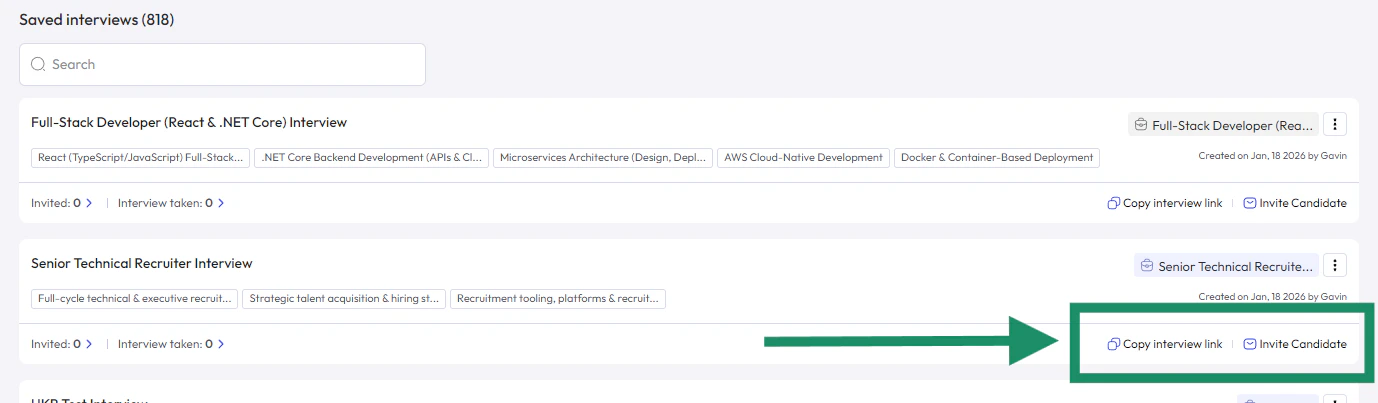
### 6. Invite candidates to the interview
After the interview is created, you can start inviting candidates.
You can invite candidates in two ways:
* Using the **public interview link**
* Inviting candidates directly from the **micro1 dashboard**
Before sending invites, make sure to customize the interview invitation email to match your role and company context.\
See: **[Customize Interview Invite Email](/kb/jobs/customize-interview-invite-email)**
### 5. Define the interview language and finalize creation
Before finishing:
* Select the language in which the interview will be conducted
* Review the configuration
* Finalize the interview creation
Once completed, the AI Interview is ready to be used with real candidates.
### 6. Invite candidates to the interview
After the interview is created, you can start inviting candidates.
You can invite candidates in two ways:
* Using the **public interview link**
* Inviting candidates directly from the **micro1 dashboard**
Before sending invites, make sure to customize the interview invitation email to match your role and company context.\
See: **[Customize Interview Invite Email](/kb/jobs/customize-interview-invite-email)**
 ### 7. Review completed interview reports
As candidates complete their interviews, Zara automatically generates interview reports.
To review results:
1. Open the **[Search](https://www.zara.micro1.ai/search)** tab in the left-side navigation
2. Locate the candidate or interview you want to review
3. Open the interview report to see scores, insights, and evaluation results
These reports help you compare candidates consistently and make faster, data-driven hiring decisions.
### 7. Review completed interview reports
As candidates complete their interviews, Zara automatically generates interview reports.
To review results:
1. Open the **[Search](https://www.zara.micro1.ai/search)** tab in the left-side navigation
2. Locate the candidate or interview you want to review
3. Open the interview report to see scores, insights, and evaluation results
These reports help you compare candidates consistently and make faster, data-driven hiring decisions.